Saturday, January 13, 2018

How To Create Image Gallery In Html

Hello Friend My Name Is Viraj,Today I Will Create Image Gallery And Display On A Webpage.The emergence of CSS3 technology has enabled web designers to display images in a more interesting format without the need for jQuery. In this tutorial I would like to show you a simple way to animate an image gallery using HTML and CSS3.Sometimes you just want a simple Image Gallery. With no php, javascript or flashy Adobe flash required. Just simple, quick and dirty HTML that you can type out and be done with your post.The images you want to use in their Original format.Every image in a thumbnail format (duplicates, preferably in 150x150px).Optional: HTML editor with color coding.This article will provide code snippets on how to make an image gallery using nothing but CSS3. This will be of particular use for sites that specialize in showing images, or for commerce sites that use thumbnail images of products and want the functionality of enlarging the images.There are two variants of the demo: demo 1 and demo 2. While the variations are extremely similar, they do exhibit different characteristics. As we step through the code, those differences will be noted. The original author of this code is unknown. The site from which I discovered how to create this image gallery does not list the developer’s name.Let’s get started with placing the images on the screen. This will be done simply by floating the images to the left. There will be four rows that contain four pictures each and will be set at 25% height and width. The borders are placed in a container through box-sizing.In this tutorial you will learn how to create a simple and effective html photo gallery using a little JavaScript that you might need for your portfolio or a personal project.As this will be just a simple html photo gallery, when you hover the thumbnails, we will change the source of images just by using a single line of JavaScript, so the difficulty should be easy.Here In This Html Tutorial We Will Create Image Gallery In Html/Css/Javascript Code.Here In This Blog We Will  Create Image Gallery In Html/Css/Javascript Code.Here Is An Example Related To Topic Bellow....................


So Let Begin With Our Coding............

Step 1 :

<!DOCTYPE html>
<html>
<head>
<style>
div.gallery {
    margin: 5px;
    border: 1px solid #ccc;
    float: left;
    width: 180px;
}

div.gallery:hover {
    border: 1px solid #777;
}

div.gallery img {
    width: 100%;
    height: auto;
}

div.desc {
    padding: 15px;
    text-align: center;
}
</style>
</head>
<body>

<div class="gallery">
  <a target="_blank" href="E:\sheru_pick\IMG_20160603_225817.jpg">
    <img src="E:\sheru_pick\IMG_20160603_225817.jpg" alt="Baby Lab" width="300" height="200">
  </a>
  <div class="desc">Add a description of the image here</div>
</div>

<div class="gallery">
  <a target="_blank" href="E:\sheru_pick\IMG_20160605_195420.jpg">
    <img src="E:\sheru_pick\IMG_20160605_195420.jpg" alt="Baby Lab" width="600" height="400">
  </a>
  <div class="desc">Add a description of the image here</div>
</div>

<div class="gallery">
  <a target="_blank" href="E:\sheru_pick\IMG_20160605_195420.jpg">
    <img src="E:\sheru_pick\IMG_20160605_195420.jpg" alt="Baby Lab" width="600" height="400">
  </a>
  <div class="desc">Add a description of the image here</div>
</div>

<div class="gallery">
  <a target="_blank" href="E:\sheru_pick\IMG_20160607_151914.jpg">
    <img src="E:\sheru_pick\IMG_20160607_151914.jpg" alt="Baby Lab" width="600" height="400">
  </a>
  <div class="desc">Add a description of the image here</div>
</div>

</body>

</html>

Output :


Thursday, January 11, 2018

How To Create a Modal In html

Hello Friend My Name Is Viraj,Today I Will Create a Modal And Display On A Webpage.
We’ve familiarized ourselves with HTML and CSS; we know what they look like and how to accomplish some of the basics. Now we’re going to go a bit deeper and look at exactly how elements are displayed on a page and how they are sized.In the process we’ll discuss what is known as the box model and how it works with HTML and CSS. We’re also going to look at a few new CSS properties and use some of the length values we covered in Lesson 3. Let’s begin.Before jumping into the box model, it helps to understand how elements are displayed. In Lesson 2 we covered the difference between block-level and inline-level elements. To quickly recap, block-level elements occupy any available width, regardless of their content, and begin on a new line. Inline-level elements occupy only the width their content requires and line up on the same line, one after the other. Block-level elements are generally used for larger pieces of content, such as headings and structural elements. Inline-level elements are generally used for smaller pieces of content, such as a few words selected to be bold or italicized.Exactly how elements are displayed—as block-level elements, inline elements, or something else—is determined by the display property. Every element has a default display property value; however, as with all other property values, that value may be overwritten. There are quite a few values for the display property, but the most common are block, inline, inline-block, and none.We can change an element’s display property value by selecting that element within CSS and declaring a new display property value.The box model in CSS describes the boxes which are being generated for HTML-elements. The box model also contains detailed options regarding adjusting margin, border, padding and content for each element.The previous chapter introduced the basic text formatting properties of CSS, but that was only one aspect of styling pages. Defining the layout of a web page is an entirely different beast. That’s what this chapter is about.The “CSS box model“ is a set of rules that define how every web page on the Internet is rendered. CSS treats each element in your HTML document as a “box” with a bunch of different properties that determine where it appears on the page. So far, all of our web pages have just been a bunch of elements rendered one after another. A big part of your job as a web developer will be to apply rules from the CSS box model to turn a design mockup into a web page. As you work through this chapter, you might find yourself wondering why we have to learn all these rules instead of just uploading a giant static image of a web page (i.e., a mockup) to a web server and calling it a day.Indeed, this would make life a lot easier; however, if we didn’t separate out our content into HTML, search engines would have no way to infer the structure of our web pages, we couldn’t make our site responsive, and there would be no way to add fancy animations or interactivity with JavaScript. That’s a big enough trade-off to make CSS a worthwhile cause.This chapter covers the core components of the CSS box model: padding, borders, margins, block boxes, and inline boxes. You can think of this as the “micro” view of CSS layouts, as it defines the individual behavior of boxes. In future chapters, we’ll learn more about how HTML structure and the CSS box model combine to form all sorts of complex page layouts.The box model is our toolkit for customizing this default layout scheme. A value of block will make that element a block-level element.Here In This Html Tutorial We Will Create a Modal In Html/Css/Javascript Code.Here In This Blog We Will  Create a Modal In Html/Css/Javascript Code.Here I Will Give An Example Related To Bootstrap And How To Use It.Here Is An Example Related To Topic Bellow.

So Let Begin With Our Coding............

Step 1 :

<!DOCTYPE html>
<html lang="en">
<head>
  <title>Bootstrap Example</title>
  <meta charset="utf-8">
  <meta name="viewport" content="width=device-width, initial-scale=1">
  <link rel="stylesheet" href="https://maxcdn.bootstrapcdn.com/bootstrap/3.3.7/css/bootstrap.min.css">
  <script src="https://ajax.googleapis.com/ajax/libs/jquery/3.2.1/jquery.min.js"></script>
  <script src="https://maxcdn.bootstrapcdn.com/bootstrap/3.3.7/js/bootstrap.min.js"></script>
</head>
<body>

<div class="container">
  <h2>Modal Example</h2>
  <!-- Trigger the modal with a button -->
  <button type="button" class="btn btn-info btn-lg" data-toggle="modal" data-target="#myModal">Open Modal</button>

  <!-- Modal -->
  <div class="modal fade" id="myModal" role="dialog">
    <div class="modal-dialog">
    
      <!-- Modal content-->
      <div class="modal-content">
        <div class="modal-header">
          <button type="button" class="close" data-dismiss="modal">&times;</button>
          <h4 class="modal-title">Modal Header</h4>
        </div>
        <div class="modal-body">
          <p>Some text in the modal.</p>
        </div>
        <div class="modal-footer">
          <button type="button" class="btn btn-default" data-dismiss="modal">Close</button>
        </div>
      </div>
      
    </div>
  </div>
  
</div>

</body>

</html>


Output :


How To Use Progress Tag In Web Page

Hello Friends My Name Is Viraj,Today I Will  Use Progress Tag On Your Web Page.As per the standard defined by W3C, the progress element represents the completion progress of a task. A progress element must have both a start tag (i.e. <progress>) and an end tag (i.e. </progress>), even though it looks like a replaced element (like an input). This is good though, as it helps with fallback content as we'll cover later.Apart from the global attributes, it can have two more attributes:
max - Indicates how much task needs to be done before it can be considered as complete. If not specified the default value is 1.0.
value - Indicates the current status of the progress bar. It must be greater than or equal to 0.0 and less than or equal to 1.0 or the value of the maxattribute (if present).

Note that only adding the max attribute doesn't change the state of the progress bar because the browser still doesn't know what value to represent.This is pretty much all that we can do in HTML as rest of the work is done by CSS. At this stage let's not worry about the fallback techniques for supporting older browsers that don't understand the progress element.HTML5 introduced the progress bar element, which allows us to show the progress of certain tasks, like uploads or downloads, basically anything that is in progressIn this article, we will discuss how to add this element in the document, how to style it with CSS and animate the progress bar meter.The HTML <progress> element displays an indicator showing the completion progress of a task, typically displayed as a progress bar.This attribute describes how much work the task indicated by the progress element requires. The max attribute, if present, must have a value greater than zero and be a valid floating point number. The default value is 1.This attribute specifies how much of the task that has been completed. It must be a valid floating point number between 0 and max, or between 0 and 1 if max is omitted. If there is no value attribute, the progress bar is indeterminate; this indicates that an activity is ongoing with no indication of how long it is expected to take.A simple code example of creating a Line shaped progress bar and animating it from 0% to 100%. See the install documentation for different installation options.A few examples of using ProgressBar.js which can be quickly tested in JSFiddle. You can submit your own example suggestions to this issue.Hello Friend My Name Is Viraj,Today I Will Use Progress Tag And Display On A Webpage.Here In This Html Tutorial We Will Like To Show How To Use Progress Tag In Web Page Using Html Code.Here In This Tag Value And Max Is Define As Show In Code.Here Is An Example Related To Topic.

So Let Begin With Our Coding............

Step 1:


<!DOCTYPE html>

<html>

<body>

Downloading progress:

<progress value="22" max="100">

</progress>

</body>

</html>


Output :


How To Use Audio Tag In Html

Here In This Html Tutorial We Will Show The Functionality Related To Audio Tag.When writing in HTML, the <audio> tag is an inline element used to embed sound files into a web page. It is useful when you want to add any audio, such as a song or interview, to your web pages. The following sections contain information about this tag, including an example of it in use, as well as related attributes and browser compatibility.Within an HTML tag, an attribute dictates certain aspects of an HTML element. Attributes are made up of a name and value pair; all tags support standard attributes. The following table shows all of the current unique HTML attributes for the <audio> tag, as well as a description of each.The HTML <audio> element is used to embed sound content in documents. It may contain one or more audio sources, represented using the src attribute or the <source>element: the browser will choose the most suitable one. It can also be the destination for streamed media, using a MediaStream.It is recommended that both height and width to be directly proportional to avoid problems.

To hide the player the value of the hidden attribute (which is false at the moment) will be replaced by true. This thing is done if you are absolutely sure that the user does not wish to stop the sound.The HTML <audio> tag is used to embed audio in web pages.he HTML <audio> tag is used to specify audio on an HTML document.HTML tags can contain one or more attributes. Attributes are added to a tag to provide the browser with more information about how the tag should appear or behave. Attributes consist of a name and a value separated by an equals (=) sign, with the value surrounded by double quotes. Here's an example, style="color:black;".In our series on HTML5, we've discussed geolocation, link relations, form and keyboard events, media events, mouse events, global attributes and multimedia. This week we're going to expand upon our discussion on multimedia and delve further into HTML5's <audio> tag.The <audio> tag is new to HTML, like the <video> tag, and allows developers to embed music on their websites (and unlike earlier attempts to add audio to a website, it isn't limited to old-fashioned midi music). That said, it does have limitations on the types of files that can be used. Currently any recent browser that is based on Webkit, such as Chrome and Safari, supports the use of regular .mp3 files. Others, such as Firefox, only support the .ogg format.The good news is that you can either convert your files from .mp3 to .ogg (one audio conversion tool, media.io, can be used online) or just supply two versions of your audio file, one in each format. When Safari, for instance, comes across the <audio> tag, it will ignore the .mp3 file and move directly to the .ogg file.In HTML5, there are 3 supported audio formats: MP3, Wav, and Ogg.The Tag Is Shown As, <audio> Tag.

Here Is An Example Related To <audio> Tag.

Step 1 :

<!DOCTYPE html>
<html>
<body>

<audio controls>
  <source src="Kick.ogg" type="audio/ogg">
  <source src="Kick.mp3" type="audio/mpeg">

</audio>

</body>

</html>

Output :


How To Use Fieldset Tag In Web Page

Hello Friend My Name Is Viraj,Today I Will Use Fieldset Tag And Display On A Webpage.
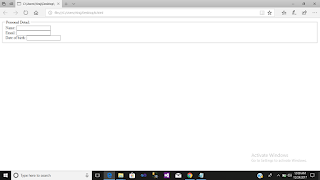
The HTML <fieldset> element is used to group several controls as well as labels (<label>) within a web form.The HTML <fieldset> tag is used for grouping related form elements. By using the fieldset tag and the legend tag, you can make your forms much easier to understand for your users.The HTML <fieldset> tag is used for grouping related form elements.By using the fieldset tag and the <legend> tag, you can make your forms much easier to understand for your users. You can also do things like, disable all child elements within a <fieldset>.HTML tags can contain one or more attributes. Attributes are added to a tag to provide the browser with more information about how the tag should appear or behave. Attributes consist of a name and a value separated by an equals (=) sign, with the value surrounded by double quotes. Here's an example, style="color:black;".There are 3 kinds of attributes that you can add to your HTML tags: Element-specific, global, and event handler content attributes.The <fieldset> tag can be used with the <legend> tag to make a form more readable and/or easier to comprehend.The <fieldset> tag is written as <fieldset></fieldset> with the grouped form controls inserted between the start and end tags.You can use the disabled attribute to disable all child form controls within the <fieldset> element. You can also use the form attribute to associate the element with a <form> element on the same document.The <fieldset> is a useful tool for organizing and grouping related items within a HTML form. The <fieldset> tag is supported in all major browsers. It has the effect of creating a box around the grouped items and showing a description to the right of each item. By using the <fieldset> tag and the <legend> tag, you can make your forms much easier to understand for your users. The <legend> tag defines a caption for the fieldset element. HTML tags can contain one or more attributes. Attributes are added to a tag to provide the browser with more information about how the tag should appear or behave. Attributes consist of a name and a value separated by an equals (=) sign, with the value surrounded by double quotes. There are 3 kinds of attributes that you can add to your HTML tags: Element-specific, global, and event handler content attributes. Here In This Html Tutorial We Will Like To Show How To Use Fieldset Tag In Web Page.Fieldset Tag Is Use To Design Or We Can Say That Diving The Information Related To Detail.

Example Related To Topic Are..

Step 1:

<!DOCTYPE html>
<html>
<body>

<form>
 <fieldset>
  <legend>Personal Detail:</legend>
  Name: <input type="text"><br>
  Email: <input type="text"><br>
  Date of birth: <input type="text">
 </fieldset>
</form>

</body>
</html>

Output :


How To Use Marquee Tag In Html

Here in this HTML Tutorial We Will Try To Show All Type Marquee Tag.The HTML <marquee> tag is used for scrolling piece of text or image displayed either horizontally across or vertically down your web site page depending on the settings.The HTML <marquee> element is used to insert a scrolling area of text. You can control what happens when the text reaches the edges of its content area using its attributes.HTML <marquee> element is used to create a scrolling text or an image. We can give it a direction horizontally or vertically.The <marquee> element comes in pairs. Which means that the tag has opening (<marquee>) and closing (</marquee> )elements.The <marquee> element was used to identify text that should move across a defined section of a webpage in a horizontal or vertical direction. The element has been deprecated and should no longer be used. CSS or JavaScript can be used to create similar effects.When writing in HTML, the <marquee> tag is a block element used to designate an area that contains scrolling text or a scrolling image. This area is in a line by default, but can be changed to a box utilizing attributes.Try to avoid using it.The HTML <marquee> element is used to insert a scrolling area of text. You can control what happens when the text reaches the edges of its content area using its attributes. The <marquee> element is obsolete and must not be used. The following sections contain information about this tag, including examples of it in use, as well as related attributes and browser compatibility.Within an HTML tag, an attribute dictates certain aspects of an HTML element. Attributes are made up of a name and value pair; all tags support standard attributes. The following table shows all of the current unique HTML attributes for the <marquee> tag.HTML <marquee> tag use to create a scrolling text or scrolling image from left to right, right to left, top to bottom, bottom to top. There is no limit. It's user define choice.<marquee> tag is a container tag to create scrolling text.<marquee> tag support following some attributes. This attributes use to add more special effect and easy control.HTML Marquee is used to scroll text or image from left to right, right to left, bottom to top and top to bottom direction. We can also control marquee speed, marquee direction , marquee scrolldelay and Stop or start marquee on mouseover and mouseout.Direction attribute can change direction of marquee, i.e from left to right, right to left, top to bottom or bottom to top. Default direction of marquee is left.I will show you in this article some ways you can animate text with the marquee tag. The marquee tag is an HTML element that makes text to move from left to right and top to down.


Step 1 :


<!DOCTYPE html>

<html>

<head>

<title>Marquee</title>

</head>

<body>

<marquee behavior="scroll" scrollamount="10" direction="up">

This is Scroll Marquee Behavior

</marquee>

<marquee behavior="slide" scrollamount="20" direction="left">

This is Side Marquee Behavior

</marquee>

<marquee behavior="alternate" scrollamount="20" direction="left">

This is alternate Marquee Behavior

</marquee>

</body>


</html> 


Output :


How To Use Image Tag In Html

Here In This Html Tutorial We Will Show The Functionality Related To Image Tag.The HTML <img> tag is used to put an image in an HTML document.Before you use the <img> tag, you need to ensure that the image exists on the internet. You then reference the location of that image when using the <img> tag.The <img> tag is written as <img src="" alt=""> (no end tag) with the image URL inserted between the double quotes of the src attribute.The alt attribute provides alternative text for users who are unable to view the image. Some reasons why users can't view the image might include having a slow Internet connection, they are vision impaired and are using text-to-speech software, the image won't load for some reason, etc. Note that the alt attribute is a required attribute.The src attribute identifies an image by a URL. The image defined by the URL is retrieved by the browser and inserted into the document when the page loadIncluding an image from another website like this is sometimes called “hotlinking.” Not all external-URL images are “hotlinks” — only when you link to an image that is already on another sight so that you don’t have to download it yourself.Hotlinking is sometimes just fine. For instance, in the above example we hotlinked an image from Wikimedia Commons. This is a Public Domain image hosted by a media provider. No problem. However, it can be a problem in certain circumstances.First of all, if the image in question is under copyright, and you do not have permission to use it, you may be in violation of copyright laws by hotlinking. Because you aren’t actually putting the image on your site, there is a bit of a legal gray area here, but it is at least potentially a problem.Related to that, even if isn’t illegal, it may be immoral or unethical if you know that the image owner does not want you to hotlink their pictures. While you aren’t exactly “stealing” the image, you are using up their bandwidth and creating ill will.Finally, if you don’t control the hotlinked image, it might change. Sometimes this just happens because sites go down or get rearranged. However, sometimes a perturbed site owner will deliberately change an image in response to hotlinking.

Hotlinking to an image hosting service is just fine, and it’s also reasonable to hotlink an image in a casual conversation on a forum or blog comment. But if an image is an integral part of your content (even if the content is a link to the image’s original source), you really should save the image to your own server.The Tag Is Shown As, <img> Tag.A relative URL does not include the domain name, and is relative to either the current page, or the current domain. If you begin the URL without a slash ( / ), it will be relative to the current page. If you begin with a slash, it will be relative to the domain.It is almost always the best idea to use source URLs which are relative to the domain, not the page. They will not break if the page content is moved or copied.
Additionally, when linking to images on your own site, it is almost always best to use relative URLs rather than absolute URLs. This way, the URLs won’t break when you change domains (which will happen automatically if you use a development or staging server in addition to your production one).HTML img tag is used to display image on the web page. HTML img tag is an empty tag that contains attributes only, closing tags are not used in HTML image element.The <img> element, like most elements, is a container. It is not an image in and of itself, but a receptacle for one.Just as the p element holds a paragraph, the img element holds an image. However, it does so in a entirely different way. Most notably, the image is a separate file that loads into the space created by the img element.There are three types of image files used in HTML, indicated by different filename extensions: .jpg, .gif and .png (also know as JPEGs, GIFs and PINGs); which we will look at next.Let's first take a look at what I used to display the image below. Note that there is no closing tag. It's one of the few elements that doesn't use them.

Here Is An Example Related To <img> Tag.

Step 1 :

<!DOCTYPE html>
<html>
<body>

<img src="IMG_20160607_152001.jpg" alt="Puppy" width="500" height="600">

</body>

</html>

Output :


How To Use Video Tag In Html

Hello Friends My Name Is Viraj,Today I Will  Use Video Tag On Your Web Page.The HTML 5 <video> tag is used to specify video on an HTML document. The <video> element, which adds native video playback support to the HTML specification in HTML5, can be used to embed a video in an HTML document. Add the video URL to the element by using either the src attribute of the <video> element or by nesting one or more <source> elements between the opening and closing <video> tags.For example, you could embed a music video on your web page for your visitors to listen to and watch.The HTML 5 <video> tag accepts attributes that specify how the video should be played. Attributes include preload, autoplay, loop and more.The <video> element is new in HTML 5 and allows you to, get this, play a movie in your website! The data of this element is supposed to be video but it might also have audio or images associated with it. See below for a full list of supported attributes.Any content between the opening and closing <video> tags is fallback content.In the W3C's overview, released on May 23rd, new features are introduced for web application developers, and new elements are introduced based on research conducted on current web development practices. Given the nature of the web and mobile devices, extra attention was given to define conformance criteria for user agents, with the goal of improving interoperability.

If you are already familiar with HTML, you will be ready to jump into HTML 5 without much of a learning curve. In the W3C's document, each of the HTML 5 elements are discussed, including the often discussed <video> element, which we will discuss here.The HTML 5 specification is from being an official specification. In fact, according to developer Ian Hickson, who is actively working on the spec, says it won't be ready until 2022. That said, the W3C has just released an overview of the vocabulary and associated APIs for HTML and XHTML, and we'll bring you the details of the <video> element in this article for web developers.This tutorial will deal with playing video on web pages using standard HTML. Tutorial will cover different kinds of method for displaying video on page. This tutorial will give you a basic understanding of the video tag and also show various examples of different integrations with other HTML5 features.

One of the most researched topic in HTML5 features is the video tag. Video tag is much more than simply an option to flash in the media. Compared to other ubiquitous HTML tags video tags recently joined the league but its capabilities and support across browsers have increased at an amazing speed.

Let us see how developers add videos: video files, including YouTube videos, are embedded into an HTML document using the tag. The src attribute defines what video file to embed into the page. The <embed> tag does not require a closing tagListed example will describe a simple example of embedding a video on page. For this we have taken a particular height and width to show the video. attribute control adds video controls, like play, pause, and volume adjusting seek bar.Within an HTML tag, an attribute dictates certain aspects of an HTML element. Attributes are made up of a name and value pair; all tags support standard attributes. This content is displayed only by browsers that don't support the <video> tag.HTML tags can contain one or more attributes. Attributes are added to a tag to provide the browser with more information about how the tag should appear or behave. Attributes consist of a name and a value separated by an equals (=) sign, with the value surrounded by double quotes. Here's an example, style="color:black;".There are 3 kinds of attributes that you can add to your HTML tags: Element-specific, global, and event handler content attributes.The <video> tag was introduced in HTML 5 (officially referred to as HTML5 - without the space). HTML5 video is now widely implemented in the major browsers and it has support from major websites such as YouTube.Here In This Html Tutorial We Will Show The Functionality Related To Video Tag.In HTML5, there are 3 supported video formats: MP4, WebM, and Ogg.The Tag Is Shown As, <video> Tag.HTML 5 supports <video> tag also. The HTML video tag is used for streaming video files such as a movie clip, song clip on the web page.When writing in HTML, the <video> tag is an inline element used to embed video content into a web page. It is useful when you want to add any video, such as a music video or news report, to your web pages. The following sections contain information about this tag, including an example of it in use, as well as related attributes and browser compatibility.When utilizing the <video> tag, you need to ensure that your sound file is in the proper format. There are three accepted formats which include MP4, Ogg, and WebM.

Here Is An Example Related To <video> Tag.

Step 1 :


<!DOCTYPE html>
<html>
<body>

<video width="320" height="240" autoplay>
  <source src="video.mp4" type="video/mp4">
  <source src="video.ogg" type="video/ogg">

</video>

</body>
</html>

Output :


How To Use Paragraph Tag In Html

Here in this HTML Tutorial We Will Try To Show Paragraph Tag.HTML paragraph tags are used to define the HTML paragraph element. Theparagraph element begins with the HTML <p> tag and ends with the HTML </p>tag. The HTML paragraph element should not contain tables and other block elements.HTML paragraph tags are used to define the HTML paragraph element. The paragraph element begins with the HTML <p> tag and ends with the HTML </p> tag. The HTML paragraph element should not contain tables and other block elements.The HTML paragraph element can only contain inline elements which are listed at the HTML Inline Elements page.The HTML <p> element represents a paragraph of text. Paragraphs are usually represented in visual media as blocks of text that are separated from adjacent blocks by vertical blank space and/or first-line indentation. Paragraphs are block-level elements.The HTML <p> tag defines a paragraph of text.HTML tags can contain one or more attributes. Attributes are added to a tag to provide the browser with more information about how the tag should appear or behave. Attributes consist of a name and a value separated by an equals (=) sign, with the value surrounded by double quotes. Here's an example, style="color:black;".There are 3 kinds of attributes that you can add to your HTML tags: Element-specific, global, and event handler content attributes.This HTML tutorial explains how to use the HTML element called the <p> tag with syntax and examples.The HTML <p> tag defines a paragraph in the HTML document. This tag is also commonly referred to as the <p> element.The paragraph tags are used to define a block of text as a paragraph. This HTML element is one of the basic HTML tags you should learn to use properly.When a block of text is surrounded by the paragraph tags, the browser automatically adds white space before and after the paragraph.The <p> element is used to identify blocks of paragraph text. The closing <p> tag is optional and is implied by the opening tag of the next HTML element encountered in an HTML document after an opening <p> tag.When writing in HTML, the <p> tag is a blockelement used to designate a paragraph. It is useful because Internet browsers add a bit of marginbefore after each element. The following sections contain information about this tag, including an example of it in use, as well as related attributes and browser compatibility.

Step 1 :

<!DOCTYPE html>
<html>
<body>

<p>This is a paragraph.</p>

</body>
</html>

Output :


How To Use Hyperlink Tag In Html

Here In This Html Tutorial We Will Like To Show How to Use A Tag In Web Page Using Html Code.The <a> tag defines a hyperlink, which is used to link from one page to another. The most important attribute of the <a> element is the href attribute, which indicates the link's destination. By default, links will appear as follows in all browsers: An unvisited link is underlined and blue.A webpage can contain various links that take you directly to other pages and even specific parts of a given page. These links are known as hyperlinks.

Hyperlinks allow visitors to navigate between Web sites by clicking on words, phrases, and images. Thus you can create hyperlinks using text or images available on a webpage.A link is specified using HTML tag <a>. This tag is called anchor tag and anything between the opening <a> tag and the closing </a> tag becomes part of the link and a user can click that part to reach to the linked document. Following is the simple syntax to use <a> tag.The <link> element is used to define a relationship between an HTML document and an external resource. This element is most commonly used to define the relationship between a document and one or more external CSS stylesheets.When most people talk about links on the web, they mean anchor links — a link within the content of a page, which is anchored to a piece of text, or an image. But you can also define a link from one document to another, using the <link> tag. This allows you to import the contents of a script or resource, such as a stylesheet, into your HTML document. You can then control the appearance or behavior of all pages by altering the content in your linked resource page.Here In This Example We Will Show The Basic Application Related To Hyperlink Tag.The anchor element is used to create hyperlinks between a source anchor and a destination anchor. The source is the text, image, or button that links to another resource and the destination is the resource that the source anchor links to.

Hyperlinks are one of the fundamental technologies that make the web the information superhighway, and understanding how to use anchor elements is one of the first things you need to master when learning HTML.While the examples above will produce anchor elements they aren’t of much use since we haven’t included any additional instructions. Right now these anchor elements link to nothing. To link a source anchor to a destination anchor, we need to apply some additional attributes to the anchor element.In this short tutorial we’ll cover the attributes you can use to add a destination anchor to your hyperlinks, tell the browser what to do with the link, and add semantic meaning to anchor elements for browsers and web crawlers to use.The HTML <a> element (or anchor element) creates a hyperlink to other web pages, files, locations within the same page, email addresses, or any other URL.

Here Is An  Example

Step 1:

<!DOCTYPE html>
<html>
<body>

<p><a href="https://htmltutorial01.blogspot.com">Visit our HTML tutorial</a></p>

</body>
</html>

Output :


How To Use Table Tag In Html

Here In This Html Tutorial We Will Try To Show How To Use Table Tag In Web Page.Tables consist of the <table> element as well as other table-related elements. These other elements are nested inside the <table> tags to determine how the table is constructed.The HTML <table> tag is used for defining a table in an HTML document. The <table> tag contains other tags that define the structure of the table.An HTML table is defined with the <table> tag.The <table> tag is written as <table></table> with the various table elements nested between the start and end tags.Each <tr> element represents a row in the table. A row can have one or more <td> or <th> elements, which determine the columns in the table. Specifically, <td> represents table data and <th> represents a table header.The HTML <table> tag is used for defining a table. The table tag contains other tags that define the structure of the table.The HTML table model allows authors to arrange data -- text, preformatted text, images, links, forms, form fields, other tables, etc. -- into rows and columns of cells.Each table may have an associated caption (see the CAPTION element) that provides a short description of the table's purpose. A longer description may also be provided (via the summary attribute) for the benefit of people using speech or Braille-based user agents.

Table rows may be grouped into a head, foot, and body sections, (via the THEAD, TFOOT and TBODY elements, respectively). Row groups convey additional structural information and may be rendered by user agents in ways that emphasize this structure. User agents may exploit the head/body/foot division to support scrolling of body sections independently of the head and foot sections. When long tables are printed, the head and foot information may be repeated on each page that contains table data.Authors may also group columns to provide additional structural information that may be exploited by user agents. Furthermore, authors may declare column properties at the start of a table definition (via the COLGROUP and COL elements) in a way that enables user agents to render the table incrementally rather than having to wait for all the table data to arrive before rendering.Table cells may either contain "header" information (see the TH element) or "data" (see the TD element). Cells may span multiple rows and columns. The HTML 4 table model allows authors to label each cell so that non-visual user agents may more easily communicate heading information about the cell to the user. Not only do these mechanisms greatly assist users with visual disabilities, they make it possible for multi-modal wireless browsers with limited display capabilities (e.g., Web-enabled pagers and phones) to handle tables.Tables should not be used purely as a means to layout document content as this may present problems when rendering to non-visual media. Additionally, when used with graphics, these tables may force users to scroll horizontally to view a table designed on a system with a larger display. To minimize these problems, authors should use style sheets to control layout rather than tables.Each table row is defined with the <tr> tag. A table header is defined with the <th> tag. By default, table headings are bold and centered. A table data/cell is defined with the <td> tag.

Step 1:

<!DOCTYPE html>
<html>
<head>
<title>Table Design</title>
</head>
<table cellspacing="1" cellpadding="4" border="1" bordercolor="red">
<tr>
<th rowspan=2>Sr.No.
<th rowspan=2>Student Name
<th colspan=4>subject Name
</tr>
<tr>
<th>Hindi</td>
<th>English</td>
<th>Math</td>
<th>science</td>
</tr>
<tr>
<td>1</td>
<td>viraj</td>
<td>45</td><td>55</td><td>85</td><td>35</td>
</tr>
<tr>
<td>2</td>
<td>anil</td>
<td>25</td><td>65</td><td>45</td><td>95</td>
</tr>
</body>
</html>


Output :


Wednesday, January 10, 2018

How To Create Pagination In Html

Here In This Html Tutorial We Will  Create Pagination Using Html/Css/Javascript Code.Paging helps present data in a clean and elegant way and it can also improve the page load time. It helps by dividing extensive data into separate pages so that it can easily fit in the UI. In this post, we’ll learn how to add pagination to your HTML table element with the help of jQuery.The following CSS classes are used to style page numbers. The focus CSS class will style the page number on focus. The pageNumber class will style the position of the page numbers.To implement this function, you’ll need to get the count of total records and then divide the total count value with the per page records to get the total number of pages. Finally, add the page numbers to a div and attach a click event to the page numbers to display the next set of records.Most paginated listings on the web are managed either with server side logic, javascript, or a combination of both. With the first option, the user’s browser wait on network traffic back to the server and back down again. Even if the data is as succinct as possible, a bad connection or crowded wi-fi can make your site look slow. An example of this sort of method can be seen on google search results. Each page requires a new querystring and page load. With the second option, the html for each page can be loaded into the dom on the first page load and then a script will manage displaying each separate page or section of data as the user interacts with the page’s navigation. The downside of this approach is that if script is disabled, as is so often the case on computers with high security settings, the only ways to recover are to display either a single page at a time using server side logic, or to display the entire listing without pagination at all, which can make for an enormously long page. The last option uses a combination of both, and can result in a smoother user experience, but also then suffers from the drawbacks of both. This last option can be seen in effect by scrolling to the bottom of a facebook page; the first “page” of content is loaded up first, and only by scrolling down is additional content then called down from the server and added to the page via javascript.Now that we’ve got them separated into page containers there’s one thing that’s important to make note of. You may have noticed that page1 is actually listed last. It’s also important to note that the order of all pages that aren’t the first page isn’t relevant to this process, only that the page you want displayed by default, or first, is the last child of the .pages container. This is so that we can take advantage of a special kind of css selector in order to get around css’s inability to select nodes up the dom. If you intend to use my advanced method below however, it is necessary to display the pages in order with the only exception still being that the first page be listed last.jQuery pagination. All we know, that when we facing with necessarity to display large amount of data – we starting thinking about adding pagination. So we split all our content to several pages. And in this case – each page contain some part of our information. As usual this is server-side pagination, where we extracting necessary amount data from database for each page. But commonly, in case of small (or middle) data sets – we don`t need such pagination. And we can just use user-side pagination using javascript to manage with our pages. Today I will show you how to create such pagination.Here In This Blog We Will  Create Pagination Using Html/Css/Javascript Code.


Here Is An Example Related To Topic Bellow....................

Step 1 :

<!DOCTYPE html>
<html lang="en">
<head>
  <title>Bootstrap Example</title>
  <meta charset="utf-8">
  <meta name="viewport" content="width=device-width, initial-scale=1">
  <link rel="stylesheet" href="https://maxcdn.bootstrapcdn.com/bootstrap/3.3.7/css/bootstrap.min.css">
  <script src="https://ajax.googleapis.com/ajax/libs/jquery/3.2.1/jquery.min.js"></script>
  <script src="https://maxcdn.bootstrapcdn.com/bootstrap/3.3.7/js/bootstrap.min.js"></script>
</head>
<body>

<div class="container">
  <h2>Pagination</h2>
  <p>The .pagination class provides pagination links:</p>                  
  <ul class="pagination">
    <li><a href="#">1</a></li>
    <li><a href="#">2</a></li>
    <li><a href="#">3</a></li>
    <li><a href="#">4</a></li>
    <li><a href="#">5</a></li>
  </ul>
</div>

</body>

</html>

Output :


How To Create the Animation Using Html

Here In This Html Tutorial We Will Create the Animation Using Html/Css/Javascript Code.

HTML stands for Hyper Text Markup Language. It is the standard markup language used for creating web pages and web applications. It forms a triology of  technologies for the World Wide Web with Cascading Style Sheets (CSS) and JavaScriptHTML elements are the building blocks of HTML pages. HTML elements are represented by using tags, written using angle brackets. For e.g. <html> </html>, <head></head> and so on. These tags are used to interpret the content of the page.

Here In This Blog We Will Create the Animation Using Html/Css/Javascript Code.

Here Is An Example Related To Topic Bellow....................

So Let Begin With Our Coding............

Step 1 :

<!DOCTYPE html>
<html>
<style>
#container {
  width: 400px;
  height: 400px;
  position: relative;
  background: yellow;
}
#animate {
  width: 50px;
  height: 50px;
  position: absolute;
  background-color: red;
}
</style>
<body>

<p>
<button onclick="myMove()">Click Me</button>
</p> 

<div id ="container">
<div id ="animate"></div>
</div>

<script>
function myMove() {
  var elem = document.getElementById("animate");   
  var pos = 0;
  var id = setInterval(frame, 5);
  function frame() {
    if (pos == 350) {
      clearInterval(id);
    } else {
      pos++; 
      elem.style.top = pos + 'px'; 
      elem.style.left = pos + 'px'; 
    }
  }
}
</script>

</body>

</html>

Output :


How To Create Basic Website In Html

Hello Friends My Name Is Viraj,Today I Will Create Basic Website On Your Web Page.

HTML stands for Hyper Text Markup Language. It is the standard markup language used for creating web pages and web applications. It forms a triology of  technologies for the World Wide Web with Cascading Style Sheets (CSS) and JavaScriptHTML elements are the building blocks of HTML pages. HTML elements are represented by using tags, written using angle brackets. For e.g. <html> </html>, <head></head> and so on. These tags are used to interpret the content of the page.

Here In This Html Tutorial We Will Create Basic Website In Html/CssCode.

Here In This Blog We Will Create Basic Website In Html/Css Code.

Here Is An Example Related To Topic Bellow....................

Step 1 :

<!Doctype html>
<html>
<head>
<title>My Website</title>
<style>
body
{
background-color:#CD5C5C;
}
#sh1
{
     width: 1350px;
    height: 250px;
    animation-name: example;
    animation-duration: 4s; 
    animation-name: example;
    animation-duration: 4s;
animation-iteration-count:infinite;
}
@keyframes example {
    10%   {background-image:url("a1.gif");background-size:cover;}
    50%  {background-image:url("a2.jpg");background-size:cover;}
    100%  {background-image:url("a3.png");background-size:cover;}

button
{
 color:#FF6347;
 background-color:lightblue;
 border-radius:12px;
 padding:14px 40px;
}
</style>
</head>
<body>
<div id="sh1">
</div>
<br>
<center>
<button>Home</button>
<button>Login</button>
<button>Course Material</button>
<button>About Us</button>
<button>Feedback</button>
</center>
<div>
<form>
<p>Login</p>
<b>Username:</b><input type="text" name="Name" placeholder:"Enter Name"><br>
<b>Password:</b><input type="password" name="Name1"><br>
Remember Me:<input type="checkbox" name="Name2">
</div>
<div>

</div>
</body>

</html

Output :


How To Difference Between Html and Xml In Html

Hello Friends My Name Is Viraj,Today I Will   Difference Between Html and Xml On Your Web Page.XML is the acronym from Extensible Markup Language (meta-language of noting/marking). XML is a resembling language with HTML. ... XML uses DDT principle (Defining the Document Type) to formally describe the data. The maindifference between XML and HTML: XML is not a substitute for HTML.HTML is used to display data and focuses on how data looks.HTML is a markup language itself.HTML is not case sensitive.HTML is a presentation language.HTML has its own predefined tags.In HTML, it is not necessary to use a closing tag.HTML is static because it is used to display data.HTML does not preserve whitespaces.XML is a software and hardware independent tool used to transport and store data. It focuses on what data is.XML provides a framework to define markup languages.XML is case sensitive.XML is neither a presentation language nor a programming language.You can define tags according to your need.XML makes it mandatory to use a closing tag.XML is dynamic because it is used to transport data.XML preserve whitespaces.

HTML is a markup language that is used to design web pages. It is written in predefined tag elements. Its primary purpose is to display data with focus on how the data looks. XML is a markup language whose primary purpose is to transport and store data. It is a language that can be used to develop new languages and define other languages. It does not have a predefined set of tags, and allows the developer to customize tags.HyperText Markup Language (HTML) is a well known mark up language used to develop web pages. It has been around for a long time and is commonly used in webpage design. XML or Extensible Markup Language defines a set of rules for encoding documents in a format that can be read by both, human and computer.HTML is written using HTML elements, which consist of tags, primarily an opening tag and a closing tag. The data between these tags is usually the content. The main objective of HTML is to allow web browsers to interpret and display the content written between the tags. The tags are designed to describe the page content. HTML comes with predefined tags. These days, web pages are rarely only designed using HTML.XML on the other hand, is a mark up language that is fairly new and was launched in 1996 as an adaptation of SGML (Standard Generalized Markup Language). The main purpose of XML is to be an independent hardware tool used to transport and store data with focus on what the data is. XML removes the constraint of sticking to pre-designed tags and gives developers the freedom to design new tags. It was developed to create standardized specifications for creating custom mark-up languages. XML-based languages include RSS, Atom and XHTML. It is neither a programming language not a presentation language. It is known as meta-language, or a language that can be used to define other languages.The XML is well-formed and has strict set of rules. Well-formed generally means that it satisfies a list of syntax rules provided in its specification. Containing only properly  encoded legal Unicode characters, no use of special syntax characters, element tags are correctly nested, etc are a few example of the syntax rules. It also includes a well-formed declaration that states the type of document it is and what processing rules should be applied.In HTML, when a page created, the processor tries to make sense of the page and generates the content of the page. It does not require strict rules regarding the format of the page. It will generate the page best to its ability even with errors present. In XML, however, if certain rules are incorrect or the processor cannot comprehend something, the processor will generate an error code and terminate processing the file. It includes an error-handling mechanism referred to as ‘draconian’.Here In This Html Tutorial We Will Create To Difference Between Html and Xml In Html Code.Here In This Blog We Will Create To Difference Between Html and Xml In Html Code.Here Is An Example Related To Topic Bellow....................

So Let Begin With Our Coding............

Step 1 :

<html>
<head>
<title>difference between html and Xml</title>
<link rel="stylesheet" type="text/css" href="stylesheet.css"/>
</head>
<body>
<div id="heading">
<h3>difference between html and xml</h3>
<div id ="columnone">
<h3>html</h3>
<span>*html is used to display info.</span> 
<span>*html tag is predined.</span> 
<span>*html is not case sensitive.</span> 
</div>
<div id="columntwo">
<h3>xml</h3>
<span>*xml is used to display info.</span> 
<span>*xml tag is predined.</span> 
<span>*xml is not case sensitive.</span> 
</div>
</div>
</body>
</html>

Output :


How To Subtraction Two Number In Html5

Hello Friends My Name Is Viraj,Today I Will  Subtraction Two Number On Your Web Page.HTML5 includes a host of new input elements, such as the output tag. Using the output tag in conjunction with the “oninput” event listener, you can create simple or complex Web page calculators, giving the user instant results. The output tag allows you to build forms using semantic markup, since the element is specifically designed for displaying calculation results.In this tutorial we will create a simple Web page calculator to demonstrate using the output element.When building an interactive web page, online game, or even just a dynamic page layout, maths (or “Math” for our USA Friends) plays a really important role. Games need to know your score, or your position on the board, or how many goals you have scored. A dynamic web page layout needs to know how big your screen is to calculate how large each element on the page needs to be. While some web-based apps (as opposed to native apps) can handle calculations at server level JavaScript Mathematics can be used to calculate numbers dynamically without putting extra load on your server.

So as boring as it might sound, you will struggle to build may interactive elements without considering maths. Here we will introduce to you the basics of JavaScript mathematics and then we will build a function to generate two random dice rolls!The first new concept to introduce to you is that of variables. A variable is a string (a collection of letters and possibly numbers, but must start with a letter to hold a value for you. Many of the new input elements are not well supported, but the output element is supported in all current major browsers except Internet Explorer. We will also be using the “oninput” event attribute, which is supported in all recent versions of the main browsers.Text inputs on forms can be used to submit numbers. A common use would be a "quantity" input on an eCommerce site. Changing the quantity value, from the user's perspective entails tabbing or clicking to the input, deleting it's current content, and typing in a new value. Expected behavior that nobody is going to yell at you for, but these number inputs could be a little friendlier. Through use of JavaScript (yes, jQuery), let's do just that.Here In This Html Tutorial We Will Subtraction Two Number In Html/Css/Javascript Code.Here In This Blog We Will Subtraction Two Number In Html/Css/Javascript Code.Here Is An Example Related To Topic..............


So Let Begin With Our Coding............

Step 1 :

<html>
<head>hello</head>
<body>
<form method="post">
enter your first no.  :<input type="text" id="t1"/><br>
enter your second no. :<input type="text" id="t2"/>
answer:<input type="text" id="t3"/>

<input type="button" value="sub" onclick="t3.value=eval(t1.value-t2.value)"/>
</body>

</html>

Output :


How To Create Animated Effect In Html

Hello Friends My Name Is Viraj,Today I Will  Create Animated Effect On Your Web Page.

Here In This Html Tutorial We Will Create Animated Effect In Html/Css/Javascript Code.

Here In This Blog We Will Create Animated g Effect In Html/Css/Javascript Code.

Here Is An Example Related To Topic..............

Step 1 :

<!DOCTYPE html>
<html>
<head>
<style>
       div{
   width:100px;
       height:100px;
   background:red;
   Position:relative;
   /*Chrome,safari,opera*/
   -webkit-animation-name:myfirst;
   -webkit-animation-duration:5s;
   -webkit-animation-timing-function:linear;
   -webkit-animation-delay:0s;
   -webkit-animation-iteration-count:infinite;
   -webkit-animation-direction:alternate;
   -webkit-animation-play-state:running;
   /*standard syntax*/
   animation-name:myfirst;
   animation-duration:5s;
   animation-timing-function:linear;
   animation-delay:0s;
   animation-iteration-count:infinite;
   animation-direction:alternate;
   animation-play-state:running;
   }
   /*chrome,safari,opera*/
   @-webkit-keyframes myfirst{
   0%{background:red;left:0px;top:0px;}
   25%{background:yellow;left:0px;top:200px;}
   50%{background:blue;left:200px;top:200px;}
   75%{background:green;left:200px;top:0px;}
   100%{background:red;left:0px;top:0px;}
   }
   /*Standard syntax*/
   @ keyframes myfirst{
   0%{background:red;left:0px;top:0px;}
   25%{background:yellow;left:0px;top:200px;}
   50%{background:blue;left:200px;top:200px;}
   75%{background:green;left:200px;top:0px;}
   100%{background:red;left:0px;top:0px;}
   }
</style>
</head>
</body>
<p><b>Note:</b>This example does not w+ork in Internet Explorer9 and earlier versions.</p>
<div></div>
</body>

</html>

Output :


How To Create Type Writing Effect In Html

Hello Friends My Name Is Viraj,Today I Will  Create Type Writing Effect On Your Web Page.

HTML stands for Hyper Text Markup Language. It is the standard markup language used for creating web pages and web applications. It forms a triology of  technologies for the World Wide Web with Cascading Style Sheets (CSS) and JavaScriptHTML elements are the building blocks of HTML pages. HTML elements are represented by using tags, written using angle brackets. For e.g. <html> </html>, <head></head> and so on. These tags are used to interpret the content of the page.

Here In This Html Tutorial We Will Create Type Writing Effect In Html/Css/Javascript Code.

Here In This Blog We Will Create Type Writing Effect In Html/Css/Javascript Code.

Here Is An Example Related To Topic..............

So Let Begin With Our Coding............

Step 1 :

<!DOCTYPE html>
<html>
<body>

<h1>Typewriter</h1>

<button onclick="typeWriter()">Click me</button>

<p id="demo"></p>

<script>
var i = 0;
var txt = 'I Love You.';
var speed = 50;

function typeWriter() {
  if (i < txt.length) {
    document.getElementById("demo").innerHTML += txt.charAt(i);
    i++;
    setTimeout(typeWriter, speed);
  }
}
</script>

</body>
</html>

Output :


How To Create Image Gallery In Html

Hello Friend My Name Is Viraj,Today I Will Create Image Gallery And Display On A Webpage.The emergence of CSS3 technology has enabled web d...